For the true beer lover there is little better in this world than to make and of course taste your very own beer. And even though the process isn’t really that hard, there are a lot of things that can go wrong. The past 2 months Lords of the Drinks’ Micky lost his homebrew virginity. This resulted into 2 full crates of beer, but it was a bumpy ride for sure. It’s actually pretty amazing how well the beer turned out to be with all the mistakes that were made. For sure it was a very educational process and many stupid errors won’t be made in the future again. To make sure other starting homebrewers won’t fall into the same traps, we’ll guide you through them. Please don’t mind the bad quality of the pictures, but here are 13 common mistakes you can make with homebrew beer.
1. No hydrometer
This is a major handicap and it actually happened to Micky. He bought a starters kit for homebrewing, but it came without a hydrometer. With a hydrometer you can measure the amount of sugar present in your beer, as well as the yeasting process and the amount of alcohol. Without it you’re basically in the dark. Your beer might still be good, but it’s quite hard to do some damage control after an error.
2. No large pan
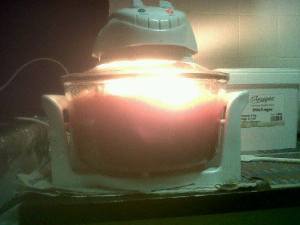
When you have a ‘bucket’ to make 25 liters of beer, it’s good to have a pan of the same size. This way you can get your beer mix to a boil in 1 go. Micky’s had to improvise with a glass oven (see picture) and an 8 liter pan. That’s why it took forever to fill up the bucket.

Amateur brewing with a capital A. Bringing the beer mix to a boil with a small glass oven and an 8 liter pan.
3. Mind your drinking while brewing
Brewing makes you thirsty. So it’s okay to make yourself comfortable with some music and drinks while you’re working. Just don’t overdo it. In Micky’s case (without a large pan) the process took a long time and by the time the bucket was full, the crate he got to set the mood was empty. When drunk you may overlook certain details and spoil your beer. Now that would be a terrible waste.

It’s great to treat yourself to some beers while making new ones, but don’t overdo it and get sloppy.
4. Make sure your equipment is really clean
Before you do anything you have to make sure that is perfectly clean. We can’t point that out enough. Any bacteria can mess up your beer completely. So use the special brewers sanitation stuff for everything.
5. Keep your equipment clean
Getting everything clean is one thing, keeping it clean quite another. So don’t throw it on a dirty table. Micky in this case used a clothes horse to make sure no new bacteria would find their entrance into his beer.
6. Make sure your malt is properly mashed
You can have the best malt in the world, but if it’s not properly mashed, your beer will miss out on it’s great taste and you’re just wasting good granes. You should break them just enough for the water to absorb all the good stuff, but don’t go too far. We don’t want to bake a cake here. Micky used a rolling pin and several disinfected clothes for this. Wrapped in the upper cloth the malt was dipped in the water like a tea bag.
7. Don’t add too much sugar
Of course, since sugar turns to alcohol in the fermentation process it’s tempting to add a lot. However the malt extracts already contain a lot of sugar and there’s only so much your yeast can handle. Especially when you don’t have a hydrometer like Micky, just stay with the recipe. An overkill of sugar can do great damage to your beer.
8. Don’t stop the boiling at the first bubles
It’s not like all bacteria are dead at the sight of the first bubbles. Keep your pan boiling for a decent amount of time to make sure your beer mix is bacteria free.

Quite a spectacular sight: waves of beer in the oven. To make sure the bacteria were all dead, Micky boiled this stuff afterwards again in his 8 liter pan.
9. Don’t throw in yeast pills as a whole
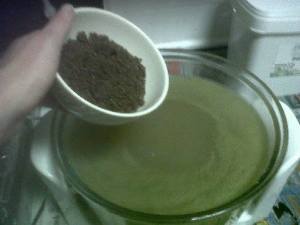
With his beer Micky used Trappist yeast, straight from the monastery that produces La Trappe beer in Tilburg (Holland). Excellent yeast, but what he didn’t know was that he was supposed to mash these pills to powder before putting them in. The fermentation process was slowed down this way. A few days later he added a few more pills, mashed this time, to fix it.
10. Don’t use dirty bottles
As a homebrewer you’re likely to use second hand bottles of beers you drunk. You have to make sure they are extremely clean, because most of the time a small amount of old beer is left in a bottle. It might not even be visable anymore, but the bacteria are there. We know all this cleaning is a bitch, but it’s absolutely necessary. Nothing as stupid as doing everything right for so many weeks, just to screw it up with the bottling.
11. Don’t touch the beer when bottling
No matter how well you wash your hands, they will always be dirty. If you want a good beer use a hose for the bottling. It may work slow but it’s worth it. Plus you get a first taste of your very own beer when sucking on the hose to get a stream going.
12. Don’t forget/overdo the sugar when bottling
For the 2nd fermentation phase you should add a little bit of sugar before you put the caps on the bottles. Don’t forget it and don’t overdo it. A teaspoon is usually enough for 2 more weeks of fermentation.

Add a little sugar before putting the cap on the bottle. Half of this spoon is enough for one bottle.
13. Make sure the bottles are air-tight
A starters kit probably comes with a handy machine to get your caps on the bottles. Most of them are probably air-tight right away, but check them anyway. When you’re not completely sure, just use another cap.
Micky’s first beer
As you read above Micky made a lot of mistakes (not all 13) when he was making his first beer. But even with all these errors after 2 months in total he still had himself a beer that was quite drinkable. For the brewers among you some extra information. He was aiming for a beer simular to Duvel, a Belgian special beer of which he found a recipe online. In this recipe already a huge amount of sugar is added before the first fermentation phase. However in his enthousiasm to get a strong beer Micky put in even more. Unlike the recipe he also used Trappist yeast, but that shouldn’t be a problem.
The most important things to change in the future are the use of a proper hydrometer and a 25 liter pan. Also He wants to use less sugar and have the yeast powdered right away. Nobody is a master brewer by birth, so the key is to keep practicing. Till the next beer. Cheers,
Micky Bumbar
.
Related articles on Lords of the Drinks:
How to brew your own beer
The disease that turns your body into a brewery
A tour through the Tyskie brewery in Poland
America allows home beermaking in all states
Hangover cures from all over the world


Pingback: Top 20 home distilled drinks or ‘moonshines’ from around the world | Lords of the Drinks
Pingback: President Obama brings back homebrewing to the White House | Lords of the Drinks
Pingback: 10 Good reasons why you should drink craft beer | Lords of the Drinks
Pingback: The oldest brew in the world, made after a song for the ancient Sumerian beer goddess | Lords of the Drinks